Getting Started with the InPlay NanoBeacon™ IN100
Introduction
If you’re unfamiliar with the IN100, it’s InPlay’s breakthrough SoC and the first of the NanoBeacon™ family.

IN100 SoC
It is set to redefine the Bluetooth beacon as we know it by providing a solution that’s ultra-low cost, ultra-low power, and, best of all: programming-free!
Working with the IN100 requires no firmware or application development.
So how does it work?
The team at InPlay built the NanoBeacon chipsets to utilize a companion desktop application called the NanoBeacon Config Tool. This tool allows you to configure and flash your application to the development kit without having to write a single line of code!
Hardware Overview
IN100 Evaluation Kit (EVK)
Inside the evaluation kit, you’ll find three development boards and one programmer board:
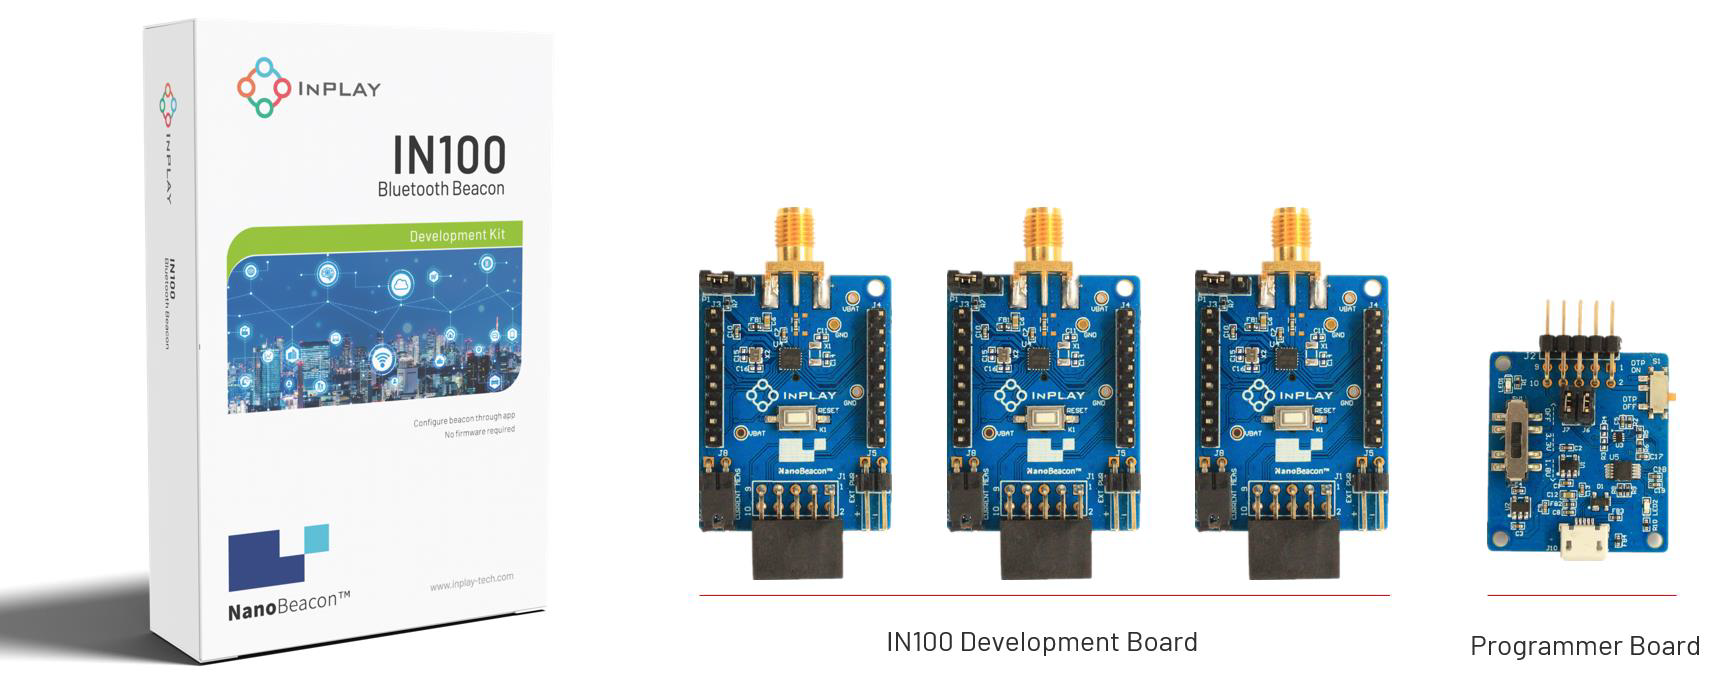
IN100 Evaluation Kit Contents
The programmer board is used to program the development board. It also serves as the interface between the NanoBeacon Config Tool and the development board.
The only thing you'll need to provide is a USB-A to Micro-USB cable:
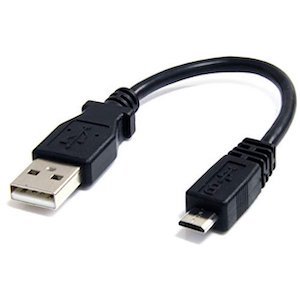
USB A to Micro-USB cable
IN100 Development Kit
Here's a look at what the IN100 development board looks like:
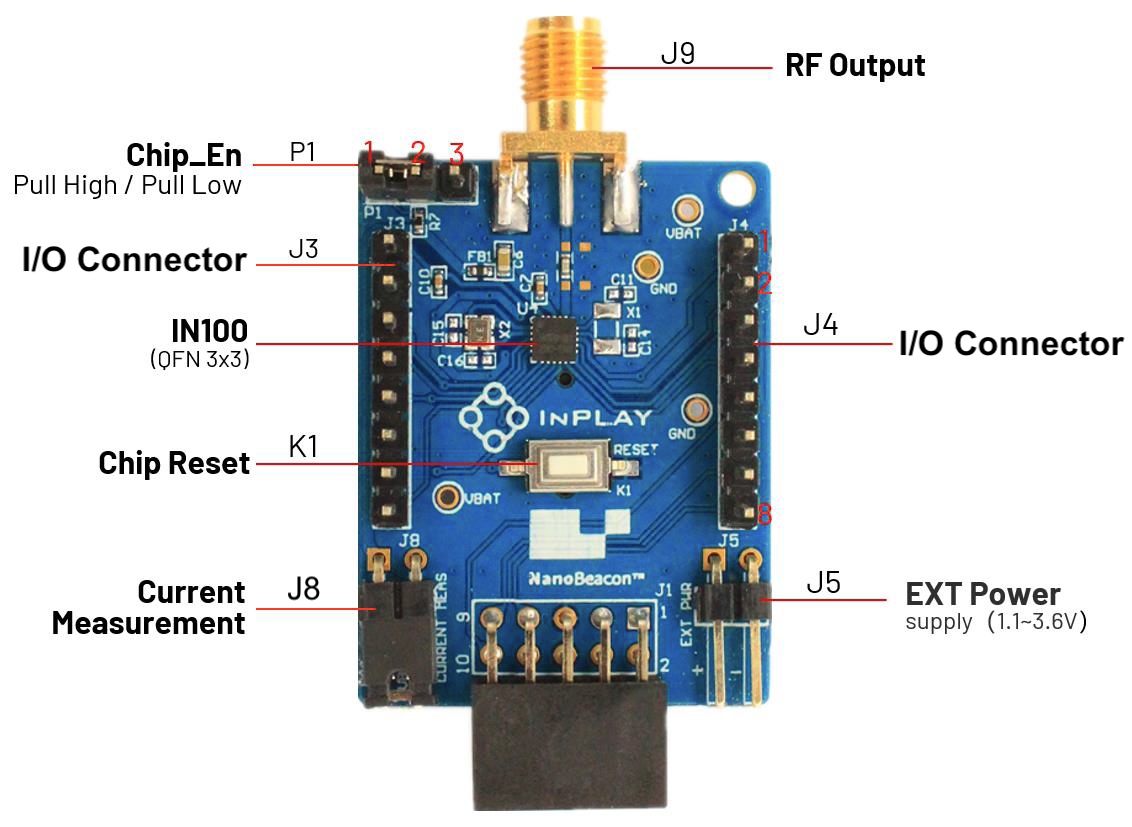
IN100 Development Board
Let's go over each of the development board components labeled in the image:
P1 (Chip Enable): this configures whether the ChipEnable line to the IN100 chipset either pull-up or pull-down
J3, J4 (I/O Connector): this provides access to the IO and power pins of the chipset
IN100 (Chipset, QFN 3x3): The IN100 SoC
K1 (Chip ResetButton): provides access to the chip reset line
J8 (Current Measurement): provides leads for current measurement operation
J9 (RF Output): this is the SMA connector for connecting an external antenna
J5 (EXT Power): The IN100 provides a wide operating voltage range of 1.1 ~ 3.6 V
10-pin female connector for connecting to the Programmer board
Programmer Board
Here's a look at what the IN100 programmer board looks like:

IN100 Programmer Board
Let's go over each of the components labeled in the image:
SW1: Power switch: provides three options to control the power supplied to the development board from the programmer: 1.8 V, 3.3 V, OFF
J10: UART interface for connecting the programmer to the PC
S1: OTP ON/OFF. This was added as a measure to prevent burning the application to the OTP by mistake
J6, J7: used to control the UART connection between the IN100 and the PC
10-pin male connector for connecting to the development board
Software Overview
The only software you'll need when working with the IN100 EVK is the NanoBeacon™ Config Tool. No IDEs, no compilers, and no debuggers!
NanoBeacon™ Config Tool
The NanoBeacon™ Config Tool is supported on all major operating systems: Windows, macOS, and Linux. You can download the tool here.
To make working with the NanoBeacon IN100 as simple as possible, the InPlay team designed it from the ground up to be programming-free. Yep! no more firmware development.
This means it's easier, faster, and lower cost than any other solution out there!
Configuring Your IN100 Application
To get started right out of the box, you don't need any external sensors or peripherals.
Let's walk through configuring the IN100 with a very simple application:
Sends out Bluetooth Low Energy advertisements (broadcast packets) every 1 second
Advertising packets contain the following data: Device Name ("IN100"), VCC Measurement (unit convertible to V), and Internal Temperature reading (unit convertible to degrees Celsius)
These advertising packets can then be easily discovered by a BLE Scanner mobile app such as nRF Connect (iOS, Android), LightBlue (iOS), or BLE Hero (iOS).
Step1: Connect the IN100 Development Board to the PC
The very first step is to make sure you connect the development board to the PC. The development board needs to be connected to the programmer board and then to the PC via a USB cable:
NanoBeacon Config Tool connected to the programmer board, then to the IN100 development board
Step2: Launch the NanoBeacon™ Config Tool application
The NanoBeacon Config Tool application runs on all the major OSes (Windows, macOS, Linux) and can be downloaded here.
Once you've downloaded and installed the application, go ahead and launch it.
Step 3: Probe and Connect to the Development Board
The NanoBeacon Config Tool is capable of automatically detecting connected development boards through the UART labeled section:
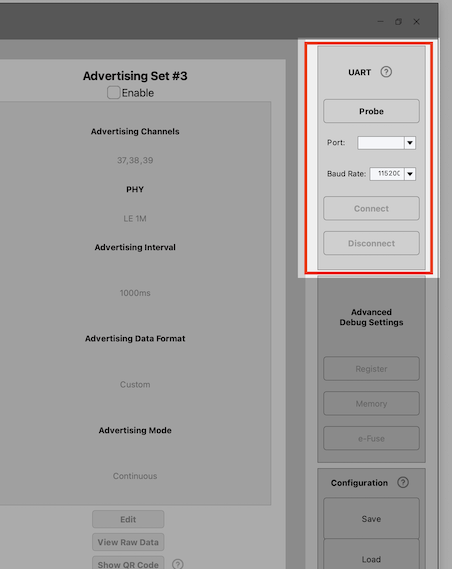
UART Section: Probing for connected devices
Simply click the Probe button, and all connected devices will be populated in the Port drop-down menu.
Select your device, make sure the Baud Rate is set to the correct value, and then click Connect:
Connect to IN100 COM Port
Step 4: Configure Your Application
Now that we're connected to our device, we can go ahead and configure it with our desired settings.
To recap, our settings will include:
Enabling one Advertising Set
Choosing the Custom Advertising Data Format for the Advertising Set
Enabling the DeviceName and setting it to "IN100"
Enabling the ManufacturerSpecific Data field and editing it to add both VCC and Internal Temperature (Big Endian format):

IN100 Configuration in under 20 seconds!
Step 5: Flash Your Application
Once you're done configuring your application, you can then flash the IN100 with your new configuration. To do this, simply click the Run in RAM button:
Flashing your application
Step 6: Capture the Advertising Data From a BLE Scanner App
Finally, we're ready to capture the advertising data on the mobile side!
Launch an app such as nRF Connect for Android and find the device, then click on it and click on RAW to display the advertising data (Device Name + Manufacturer Specific Data):

Capturing Advertising Data on an Android phone
Summary and Conclusion
And that's it!
As you can see, it's very easy and straightforward to create a simple beacon device using the InPlay NanoBeacon™ IN100 Development Board!
What are you going to create with the IN100?
An Active RFID Tag? An Eddystone Beacon?
An iBeacon? A wireless sensor?