NanoBeacon™ BLE Scanner Tutorial (Part 1)
Following the release of our new NanoBeacon BLE Scanner mobile app, we thought it would be great to publish a few tutorials on how you would use the new app along with our popular NanoBeacon IN100 beacon.
If you missed our first article announcing the new mobile app, be sure to check it out here!
In this series of tutorials, we will cover:
Installation and setup steps.
Detailed walkthroughs of various examples and how to utilize the mobile app for these use cases.
The differences between the iOS and Android versions of the app.
How to export logs from the app for captured advertising sets and packets.
How to use the new NanoBeaconLib, which provides a framework for building your own custom mobile app with minimal effort.
Requirements, Installation, and Setup
Before diving into the details of using the mobile app, you will need the following:
An IN100 EVK, specifically a programmer board, an IN100 development board, and a micro USB cable to connect them to your PC.
The NanoBeacon Config Tool PC app, version 3.2.15 or later (available for Windows, macOS, and Linux). You can download it here.
The latest version of the NanoBeacon™ BLE Scanner mobile app, which is available for both Android and iOS. You can download it here.
Once you have all the necessary components and applications, you’re ready to move on.
Overview of the NanoBeacon™ Mobile App (iOS)
There are a few UI and functional differences between the iOS and Android versions of the mobile app due to the limitations and differences between the two operating systems. Still, most of the functionality should be very similar.
In this tutorial, we will be focusing on the iOS app.
After launching the mobile app, you will be presented with the Scanner view:
The different buttons within this view are:
Filters: allow you to filter out and only display devices that match specific filters.
Clear: clears the list of discovered devices.
Scroll to Top: this allows you to scroll to the top of the list when the number of discovered items extends beyond a single-screen view.
Resume Scanning: the difference between this and Rescan is that it does not clear the list of discovered devices.
Enable Scrolling: this enables automatic scrolling to always show the latest discovered devices.
Filter Options
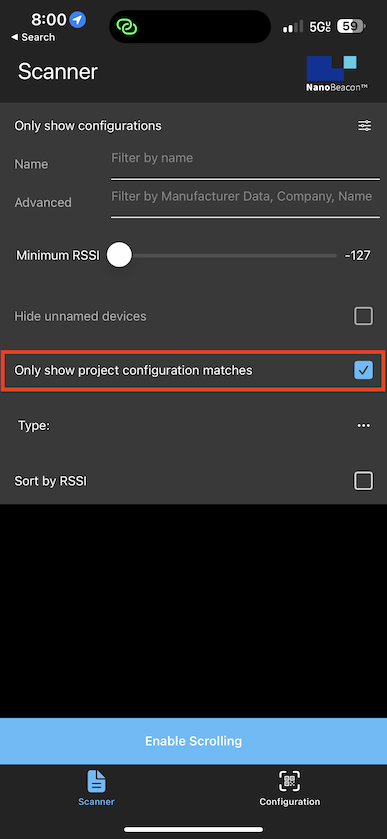
When clicking the Filter options button (three sliders icon), you’re presented with the following view and options:
Name: this allows you to filter by device name.
Advanced: allows you to filter by raw data included in the advertising data, company name, etc. On Android, filtering by Bluetooth Address is also possible.
Minimum RSSI: this allows you to filter out devices that are discovered with an RSSI lower than the set value.
Hide unnamed devices: this allows you to hide devices that do not advertise a device name.
Only show project configuration matches: allows you to only show devices that match the imported IN100 configuration (via scanning the QR code from the NanoBeacon™ Config Tool app).
Sort by RSSI: this allows you to sort the list of devices by detected RSSI (starting with the device with the strongest signal).
Type: allows you to only show any combination of iBeacon, Eddystone UID, and Eddystone TLM advertising devices, as shown below:
The other view (accessible from the bottom section of the app) is the “Configuration” view:
Load Configuration and the QR Code Scan buttons behave the same way. They allow you to scan the QR Code that the NanoBeacon™ Config Tool displays to import the IN100 configuration into the mobile app:
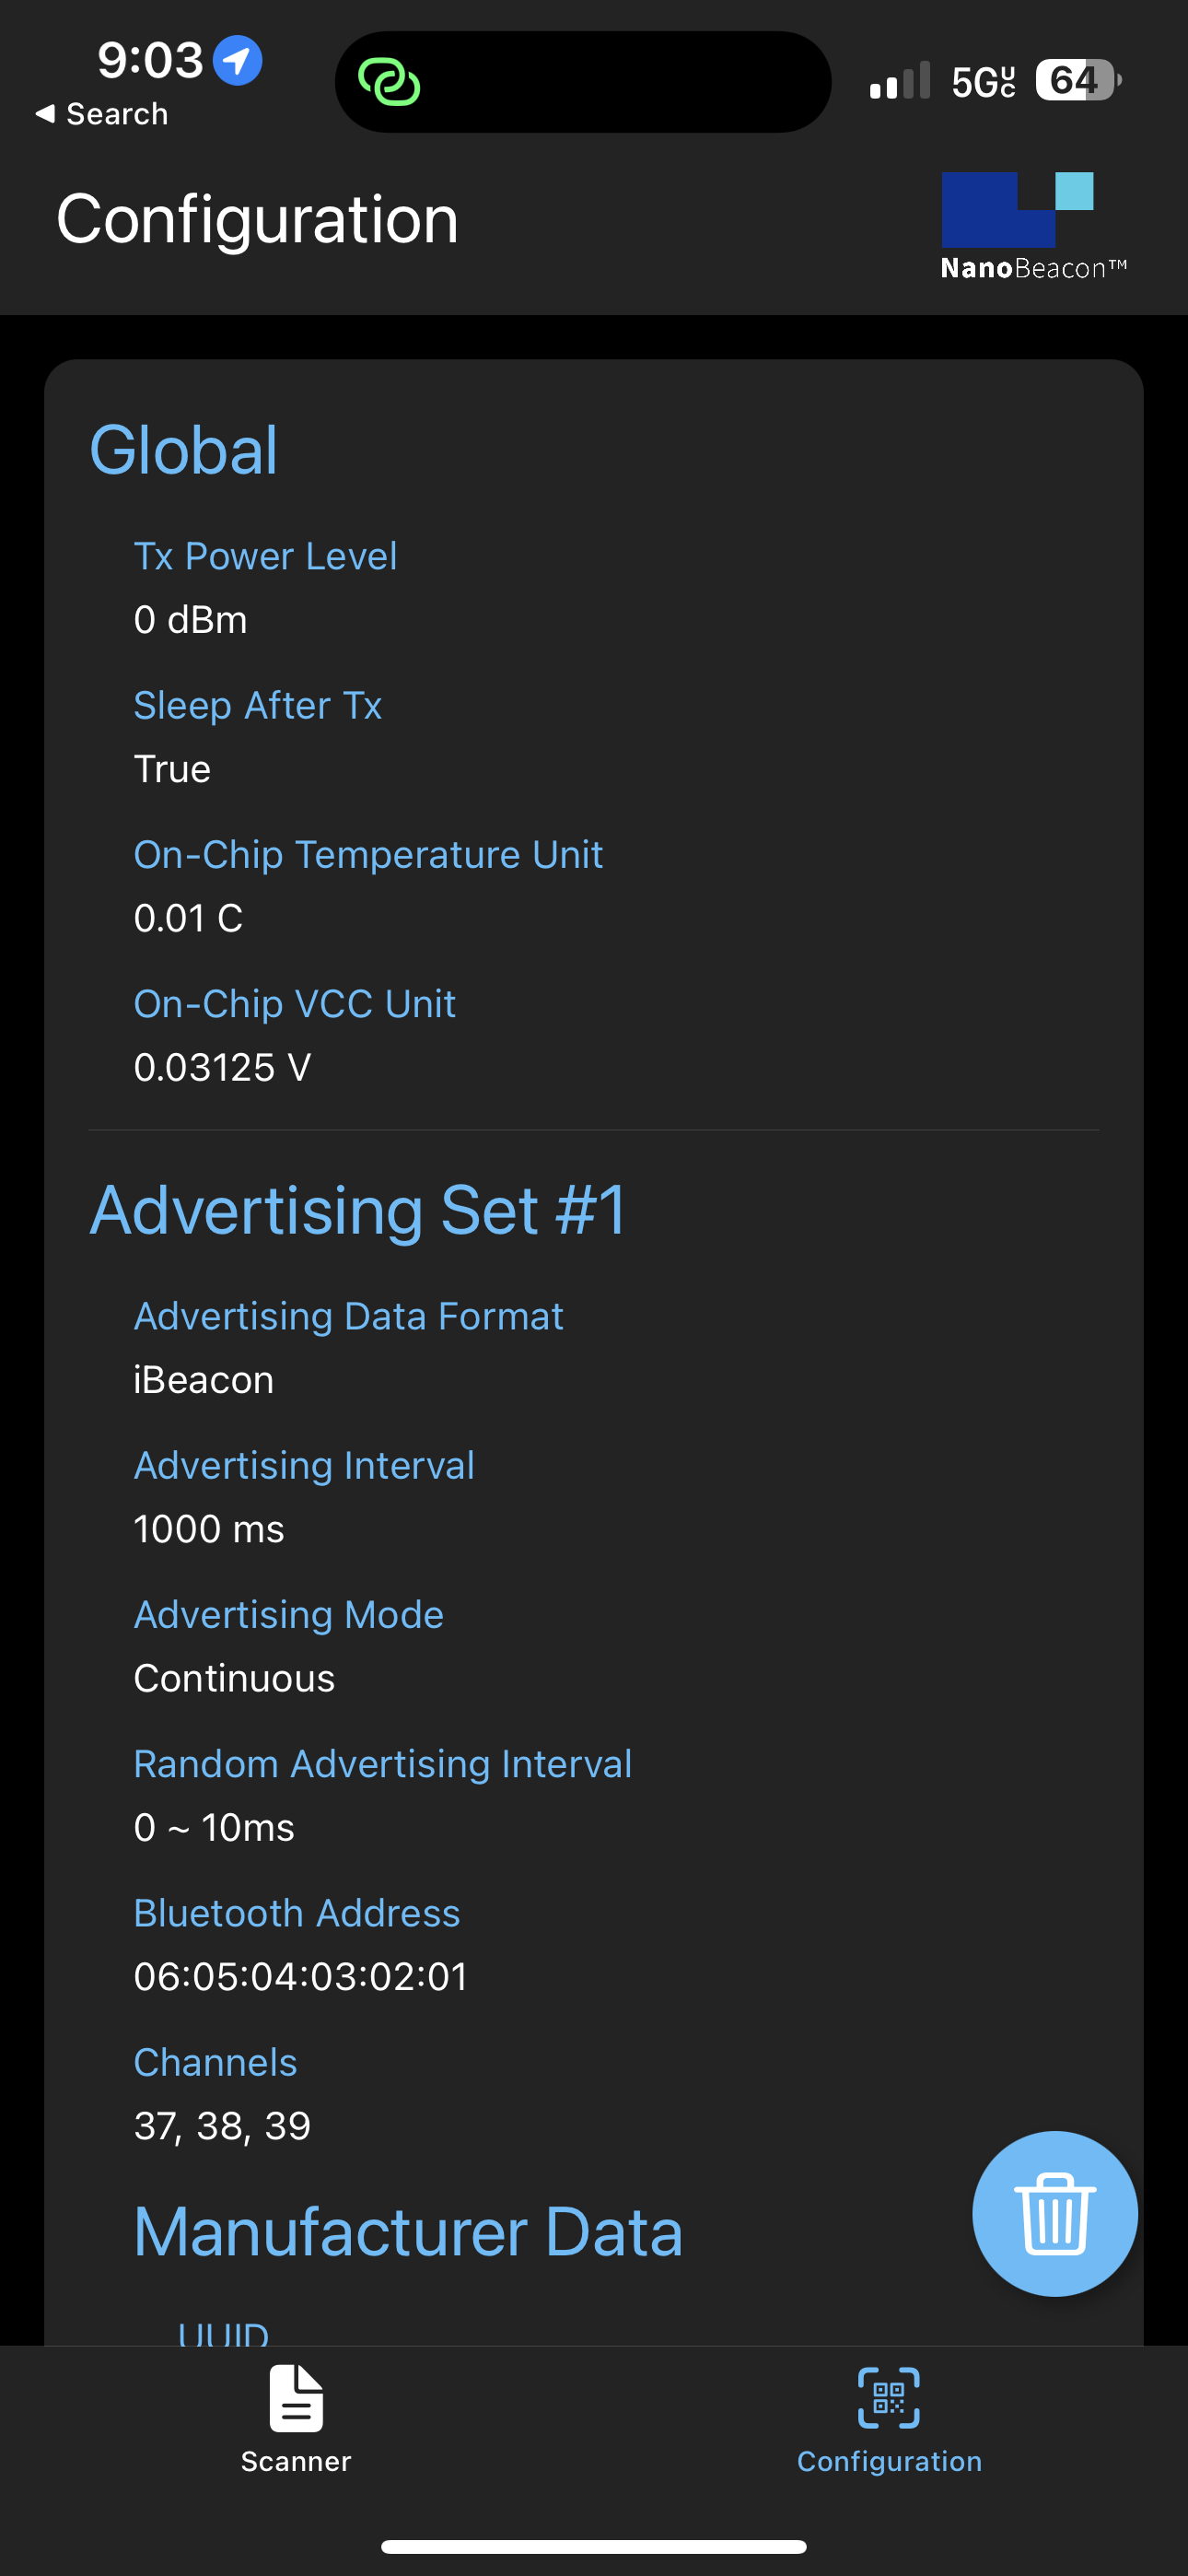
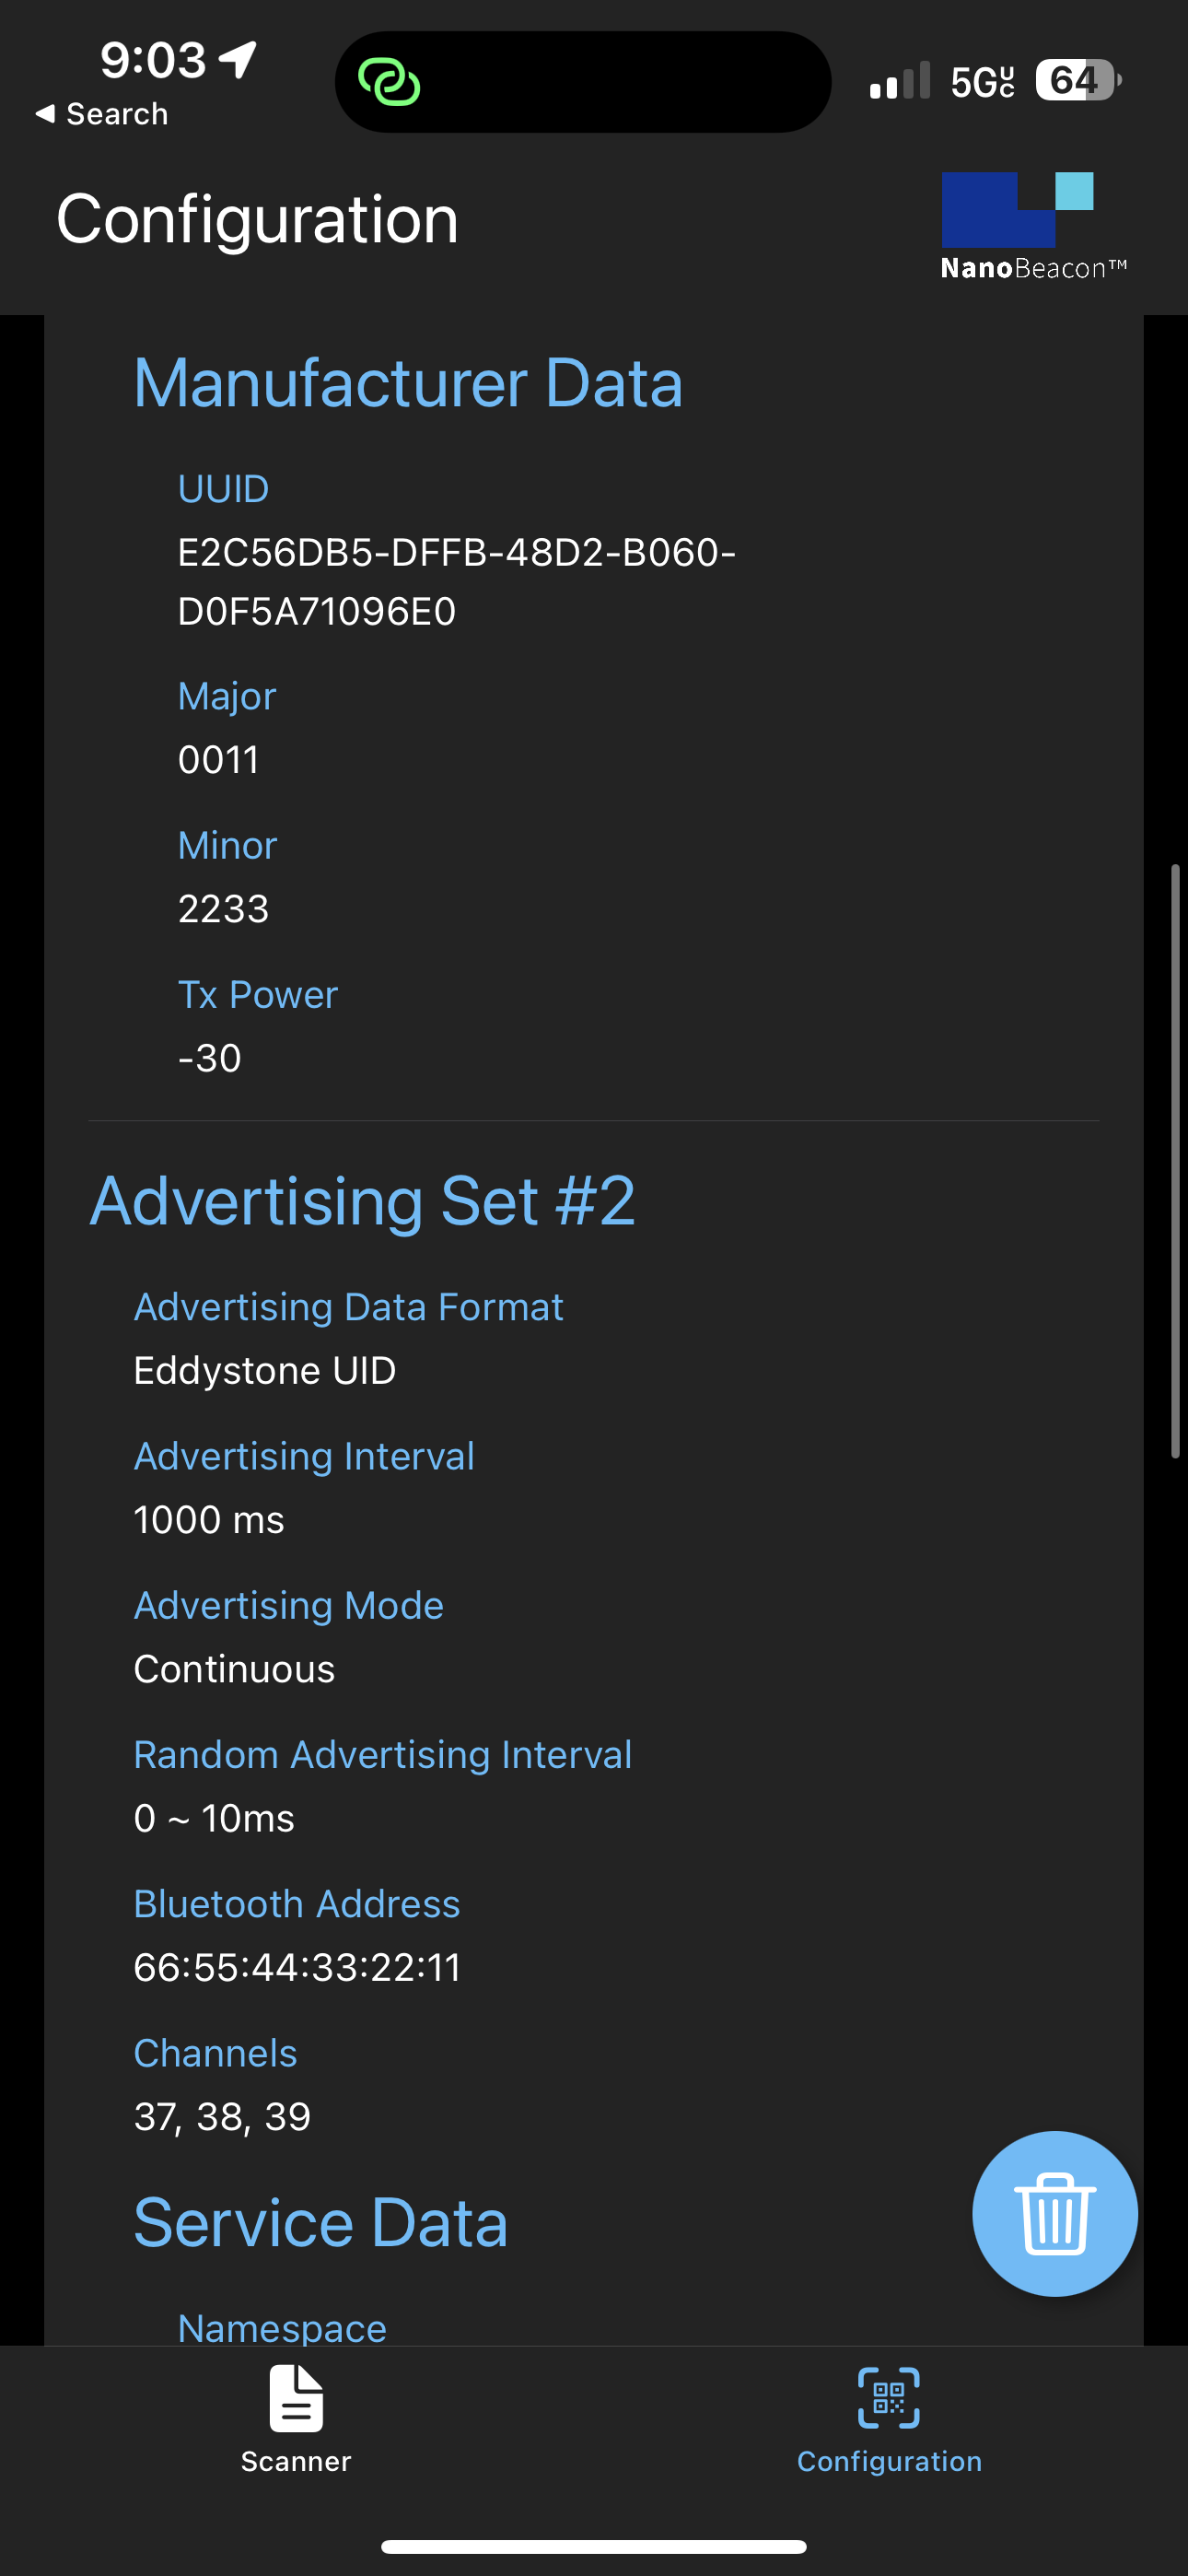
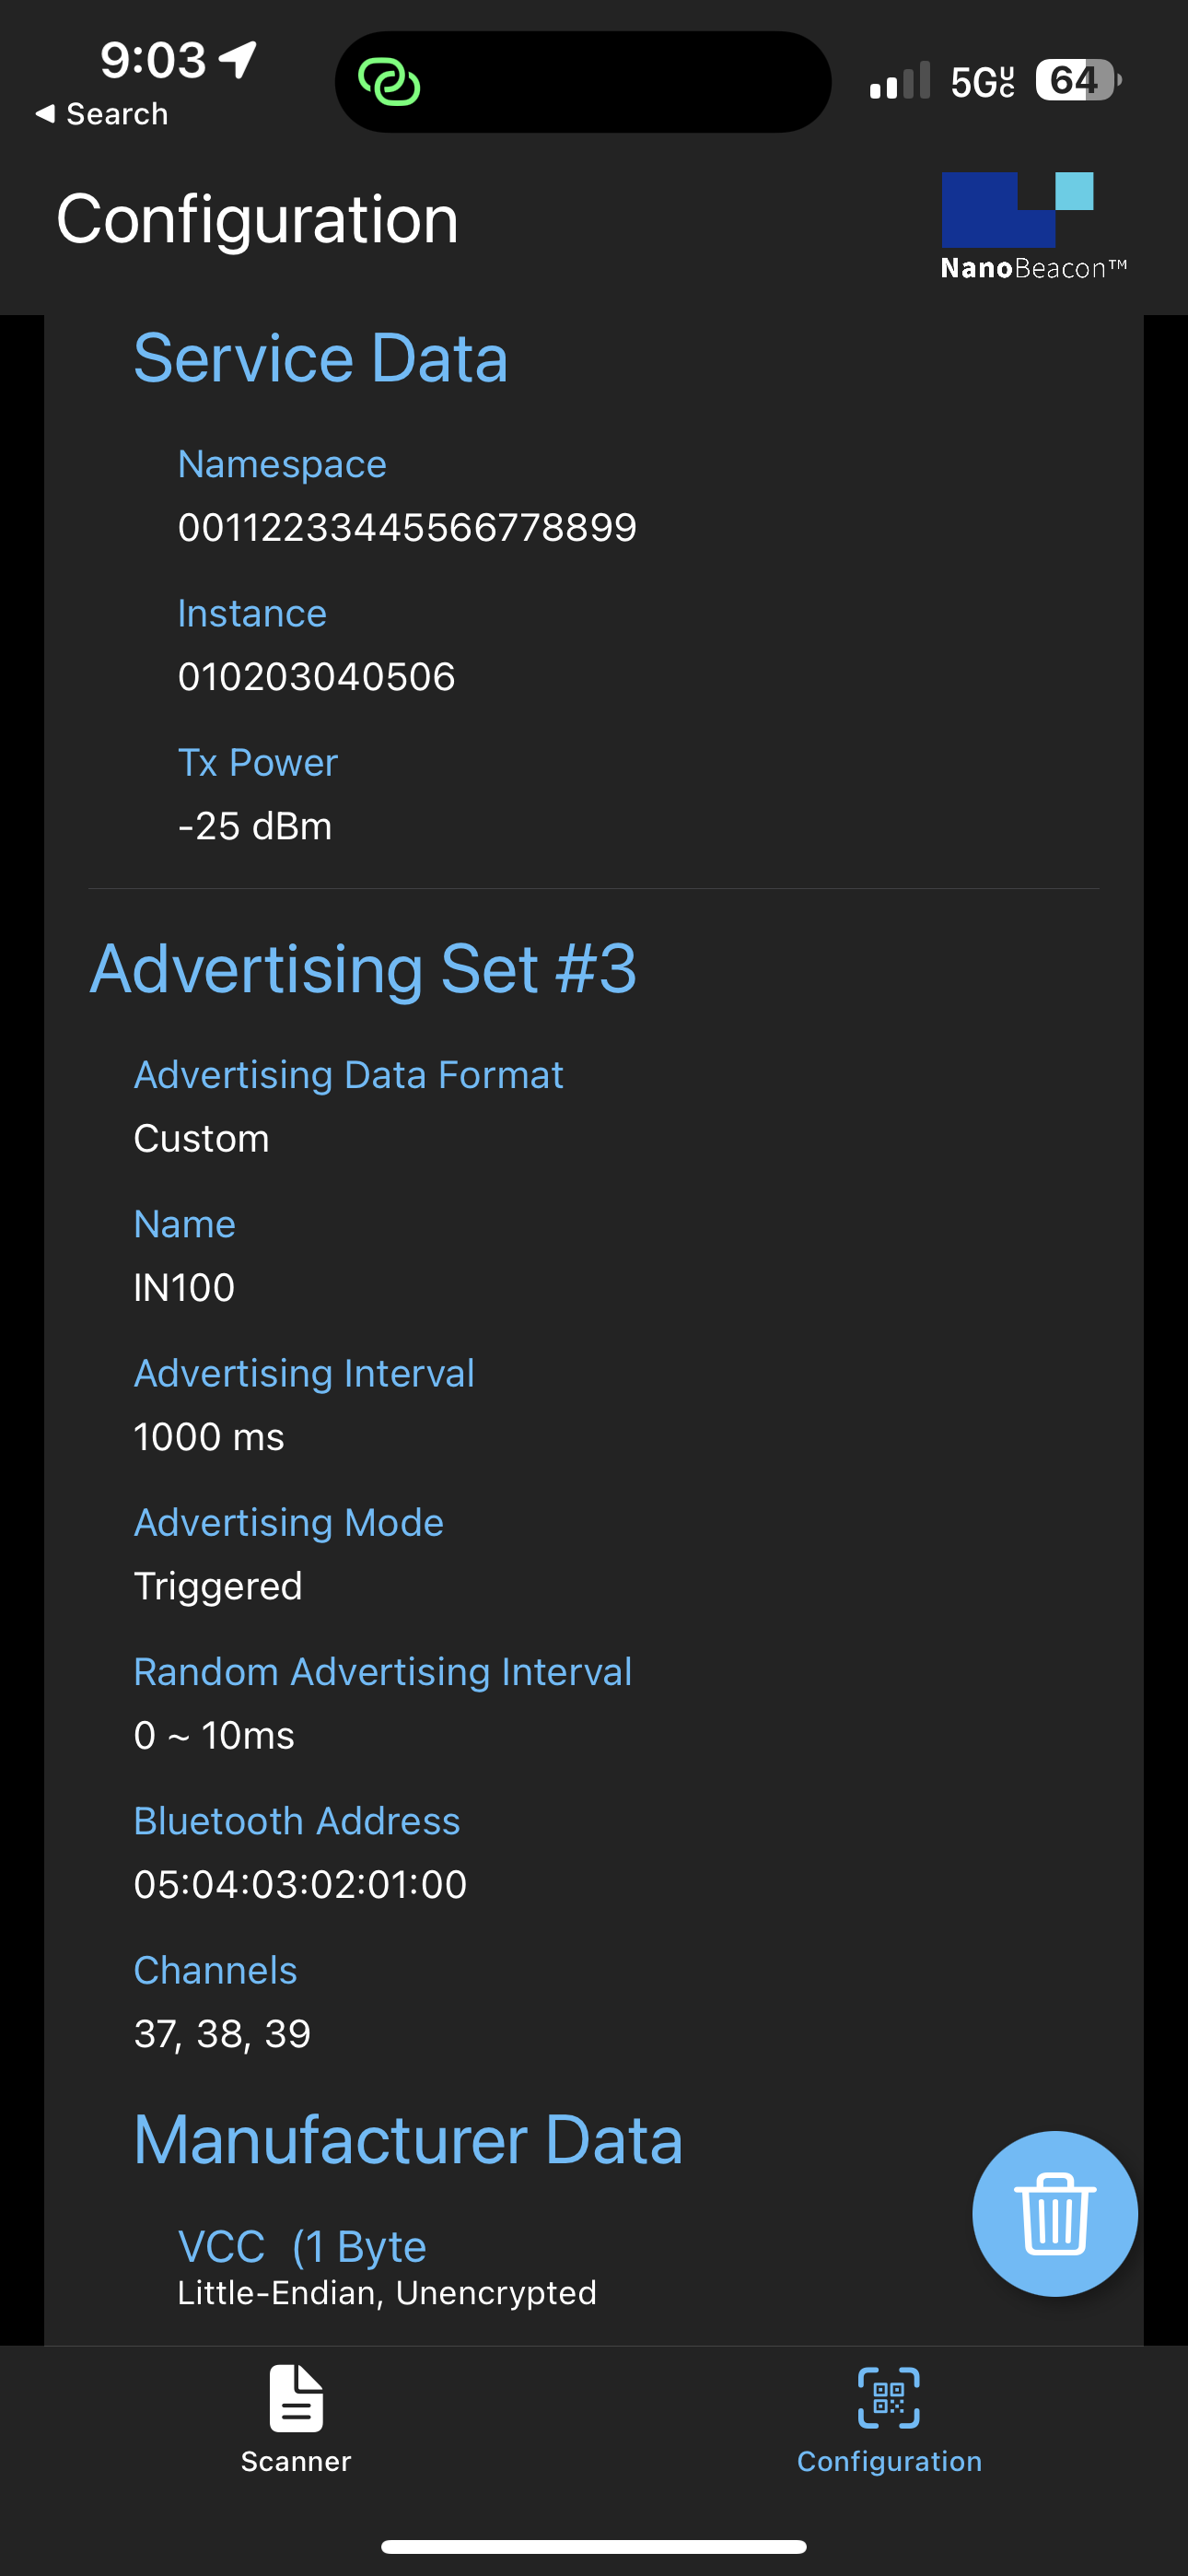
Once the configuration is imported into the mobile app, the Configuration view will show the details of the configuration:
To import a new configuration, you can delete the existing one by clicking the Trash icon (🗑️). After that, the QR Scan and Import Configuration buttons will become visible on the screen.
Let’s run through a couple of test cases to show how this works!
Test Case #1: One Advertising Set (iBeacon)
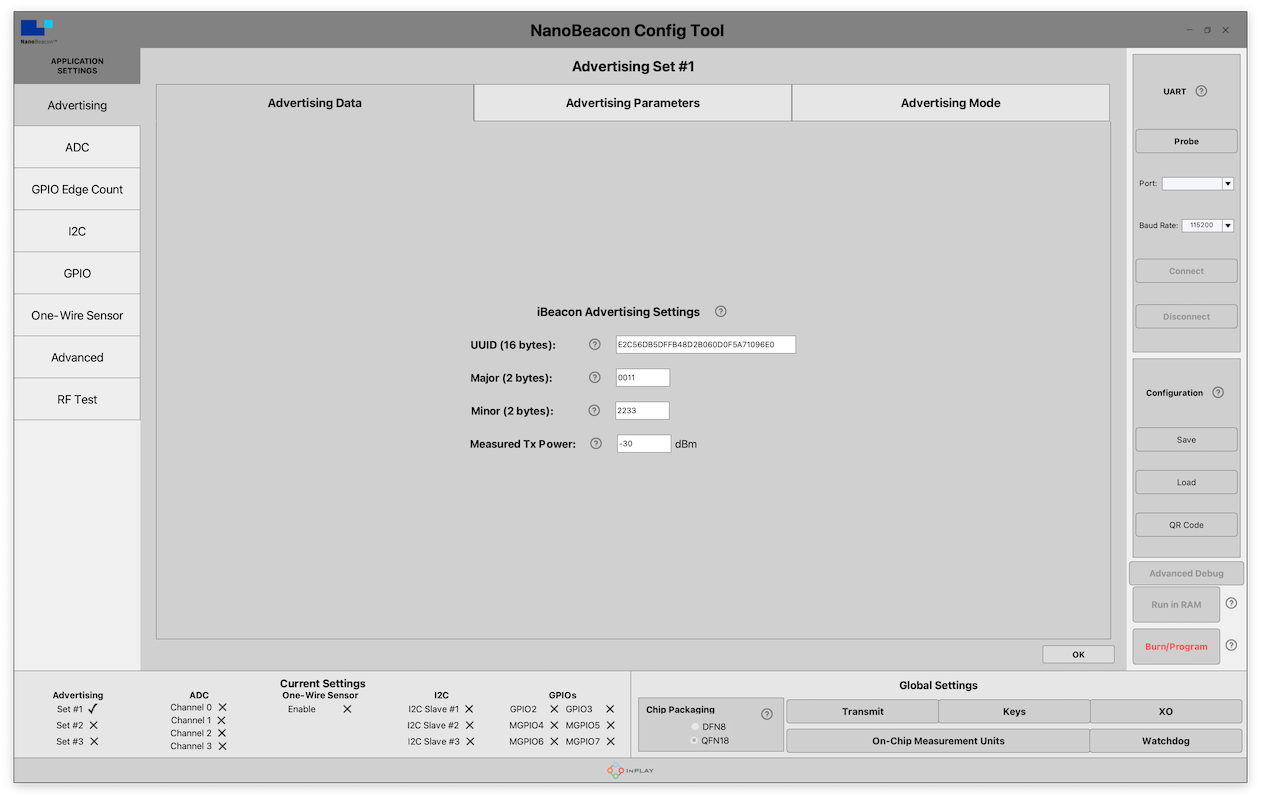
Let’s first start by configuring the IN100 in the NanoBeacon™ Config Tool application on the PC. We will configure it with the following:
One Advertising Set (Continuous)
iBeacon type
UUID: E2C56DB5DFFB48D2B060D0F5A71096E0 (randomly generated, you can generate your own UUID here)
Major: 0011
Minor: 2233
Tx Power: -30 dBm
Make sure your IN100 development and programmer boards are connected together and to the PC. Next, you’ll want to Probe and Connect to the device within NanoBeacon Config Tool. Finally, click the “Run in RAM” button.
Now, to import the configuration into the mobile app, we will use the new QR Code button available in NanoBeacon Config Tool. To import, navigate to the Configuration view and click the QR Code Scanner (or the Load Configuration) button.
Once the configuration is imported, we can see the settings on the screen:
Now we can switch to the Scanner view to discover our device.
In the Scanner view, you’ll likely see many discovered devices, which makes it difficult to find your specific device. One way around that is to look for the device that shows “Configuration Match” in its title:
But the more straightforward method is to apply the filter “Only show project configuration matches,” which will filter out all other non-matching devices.
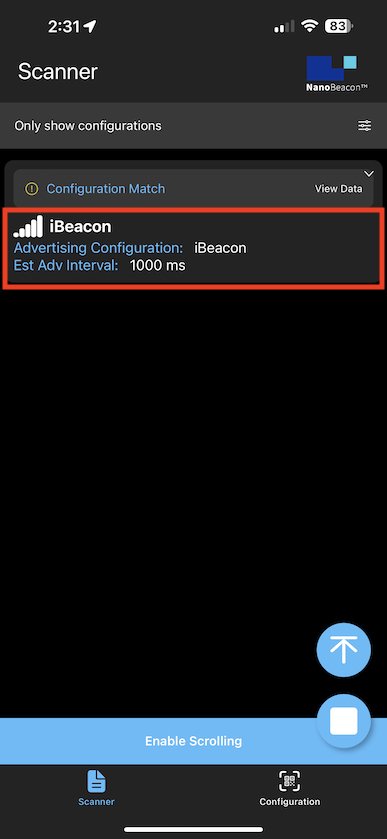
Once applied, you’ll get a much better view:
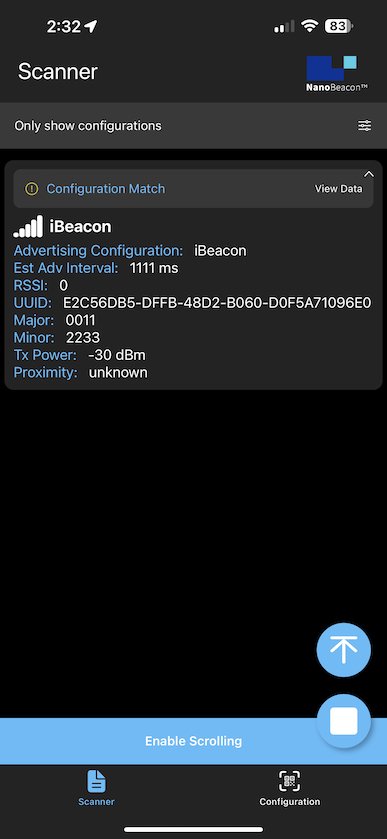
You can then click on the area (in the red box below) with the device information to view more details:
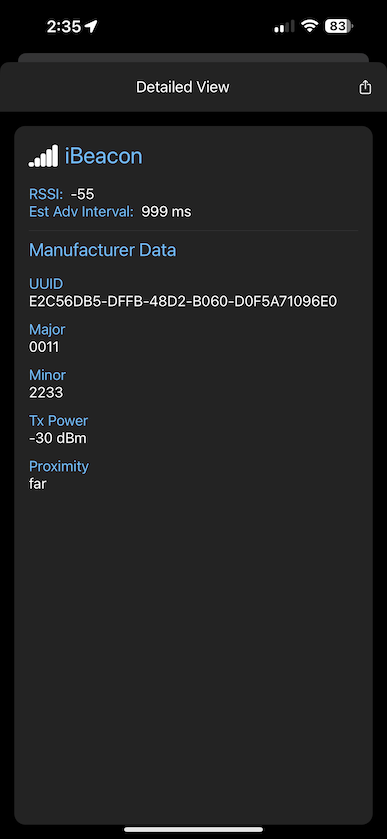
For even more details (especially for types other than iBeacon), click on the “View Data” area (in the red box below):
Test Case #2: Three Advertising Sets (iBeacon, Eddystone, Custom Data)
For a more advanced test case, let’s set up three advertising sets:
1. iBeacon (same as in Test Case #1):
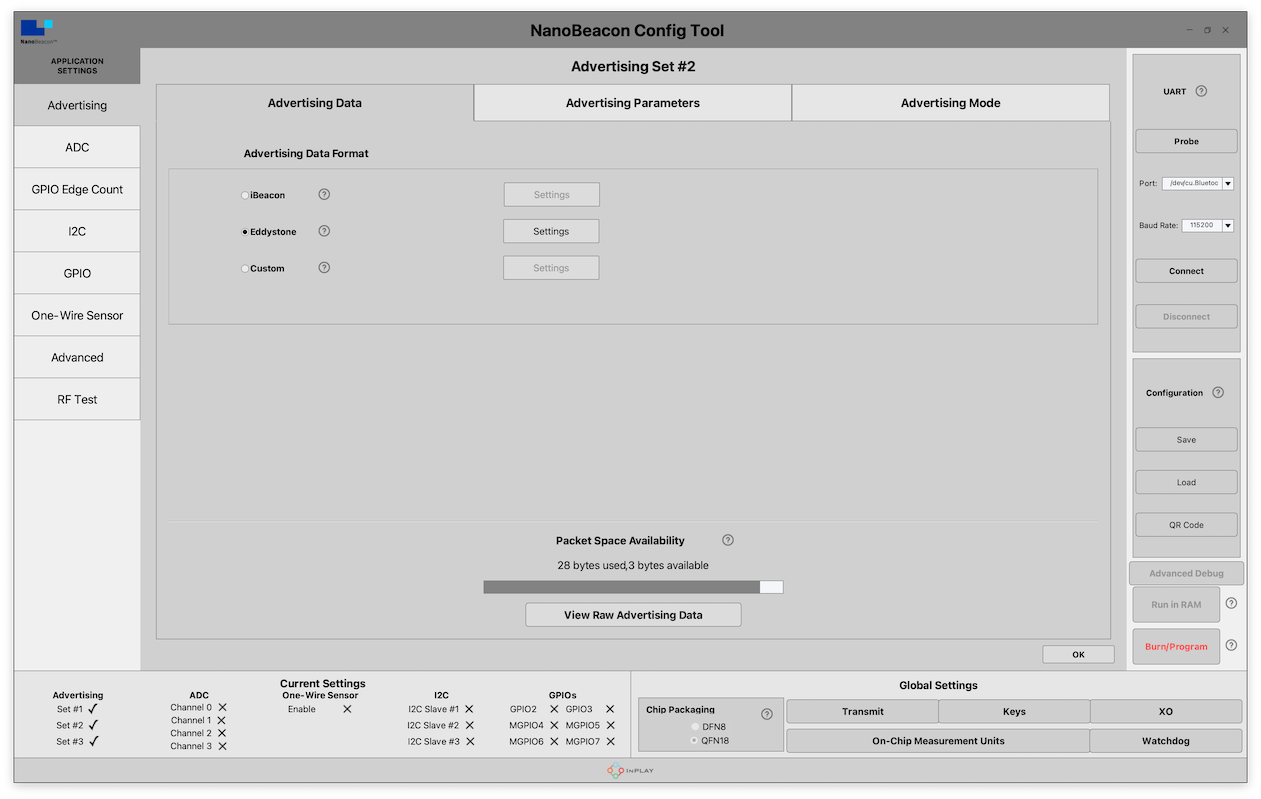
2. Eddystone UID
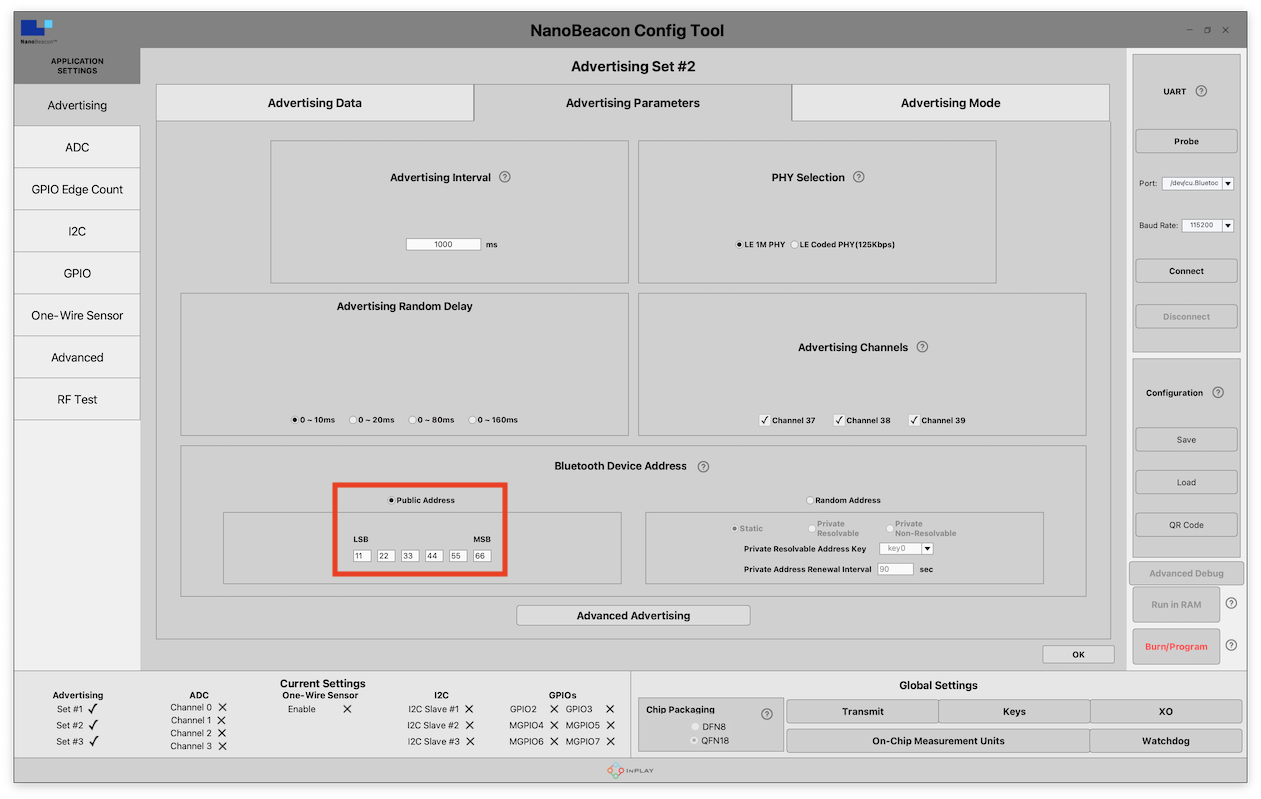
Modify the Bluetooth Address to something different than what’s set in Advertising Set #1. This is necessary for the mobile app to be able to distinguish between the different advertising sets and display them as separate “devices.” This setting can be found under “Advertising Parameters.”
Measured Tx Power: -25 dBm
Beacon ID:
10-byte Namespace: 00112233445566778899
6-byte Instance: 010203040506
Here are screenshots showing this configuration in NanoBeacon Config Tool:
3. Custom Type (Triggered)
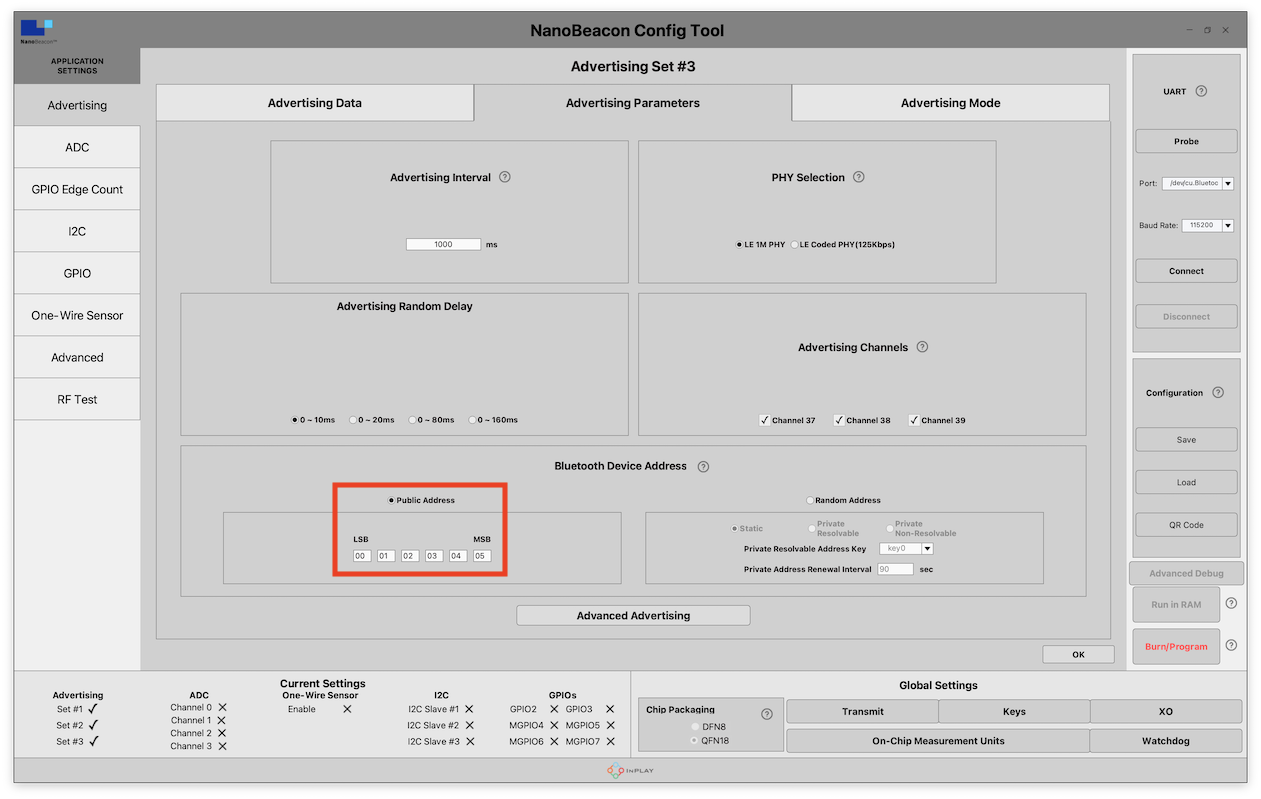
Modify the Bluetooth Address to something different than what’s set in Advertising Set #1. This is necessary for the mobile app to be able to distinguish between the different advertising sets and display them as separate “devices.” This setting can be found under “Advertising Parameters.”
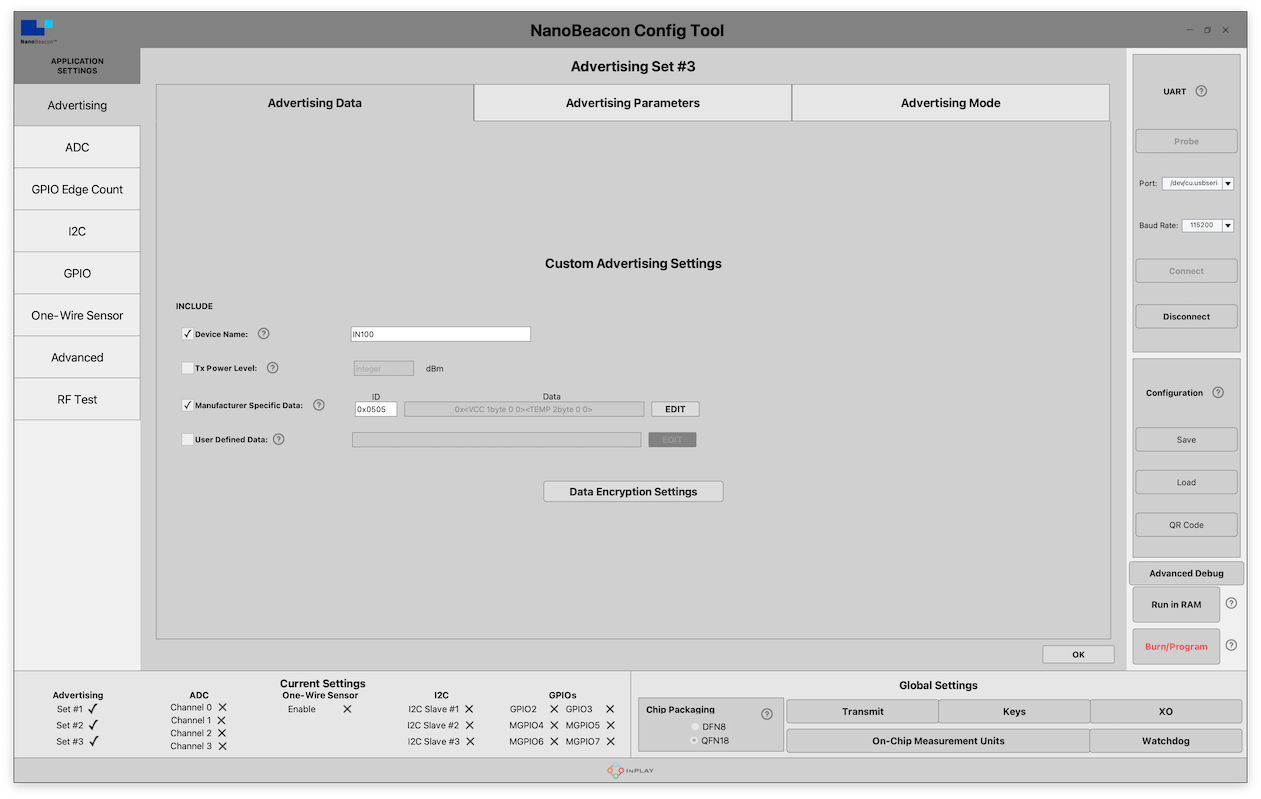
Device Name: “IN100”
Manufacturer Specific Data:
Company ID: 0505 (InPlay)
VCC
Internal Temperature
Triggered Advertising:
We will be configuring this advertising set as a Triggered type.
This will ensure that the advertising packets are only sent when specific conditions are met.
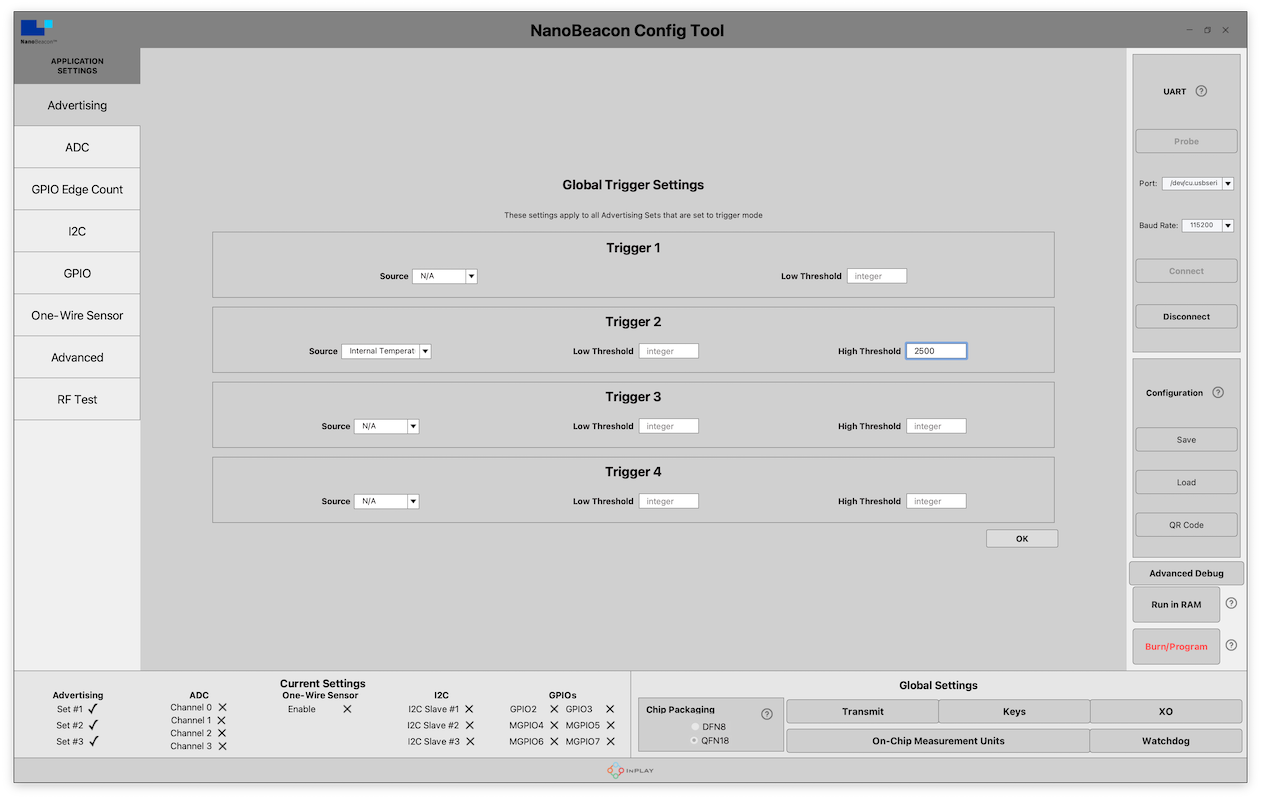
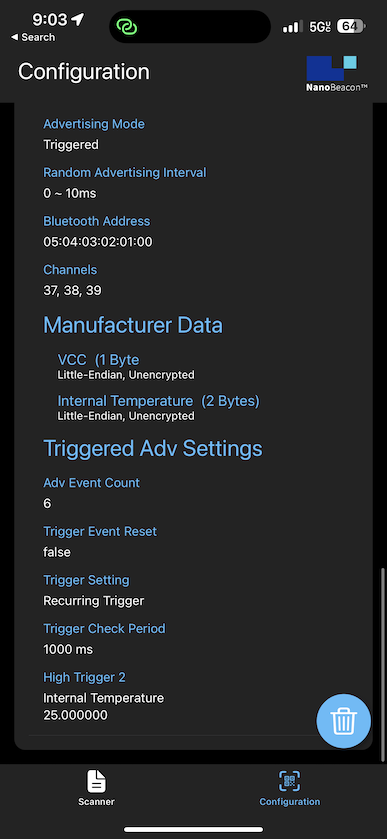
We will set a High Threshold Trigger to 25 degrees Celsius (Internal Temperature), meaning that when the internal temperature reaches 25 degrees C, this specific advertising set will be triggered and will then show up in the mobile app.
To configure this, do the following:
Navigate to Global Trigger settings → For Trigger #2, modify select Internal Temperature as the source → set the High Threshold to 2500 (this translates to Threshold * Unit, where Unit is found in the On-Chip Measurement Units settings).
Next, we need to modify the Advertising Mode to be of the Triggered type → under the "Advertising Mode” tab, select “Triggered Advertising,” and under “Sensor Trigger Source,” check the box next to “High Trigger 2”.
Here are screenshots showing these configuration settings within NanoBeacon Config Tool:
Bluetooth Address (Adv Set #3)
Custom Adv Data Format
Now, we’re ready to run the configuration, import it into the mobile app, and start testing!
Once you’ve imported the configuration, you should see the following in your Configuration view:
After importing the configuration, we are now ready to start scanning. Let’s switch to the Scanner view.
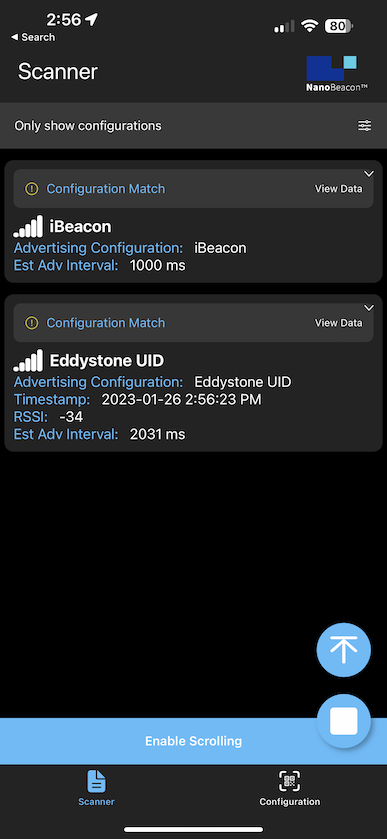
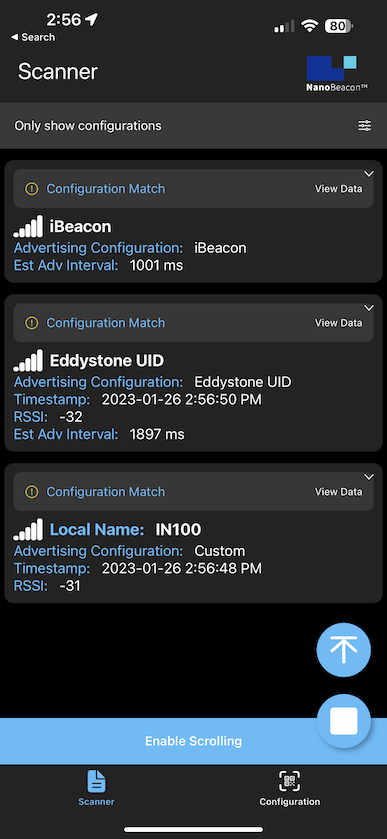
We’ll also double-check to make sure that the “Only show project configuration matches” is enabled. The scanner should now show us the two advertising sets (#1 & #2), the iBeacon and Eddystone advertising sets:
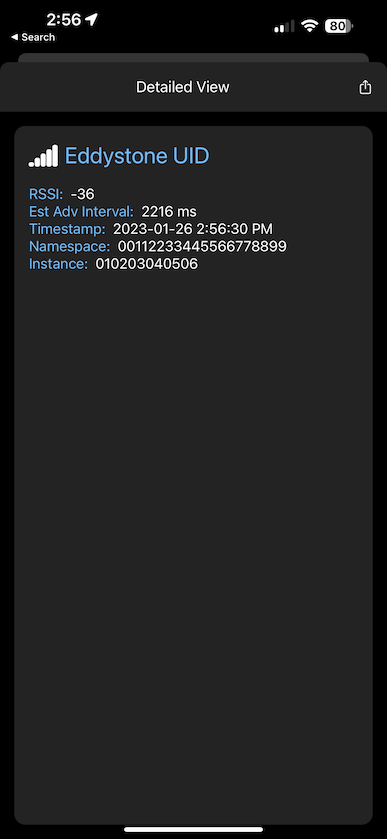
And we can navigate into the detailed views each of these advertising sets:
Notice the third advertising set (which is configured for a Triggered Custom Advertising Data Type) does not show up in the list. This is because the current internal temperature reading is under 25 deg C (at room temperature, around 21 deg C).
To test out the triggered advertisements, I will apply some heat to the IN100 chipset on the development board (by simply pressing down on it for a few seconds). Once the temperature reaches 25 deg C, we start seeing the third advertising set in the list:
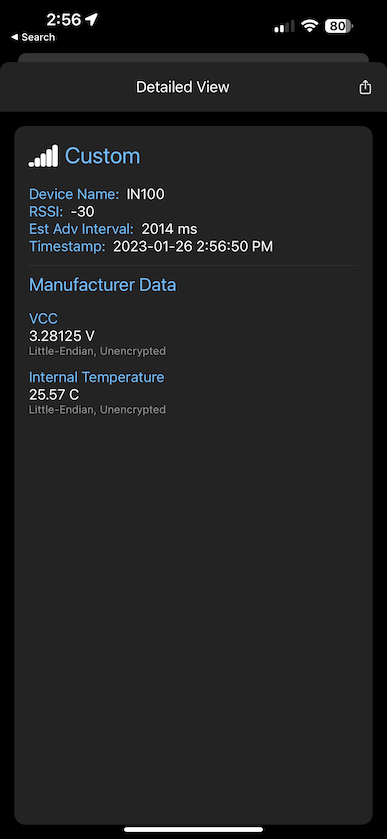
Let’s go into the detailed view to look at the advertising data:
Notice that the data is actually parsed into a human-readable format and not just hex values! This is the power of using our mobile app in combination with the IN100.
We also see that the Internal Temperature value has crossed the 25 deg C mark confirming the functionality of the Triggered Advertising Mode.
Summary & Closing
In the following tutorials in this series, we will cover lots more, including:
How to export logging data for captured advertising sets and analyze them
App notifications for Triggered Advertising Mode advertising sets
The differences between the Android and iOS apps
Diving more into the various filtering options
The new NanoBeaconLib mobile app library (allows you to develop a custom IN100-interfacing mobile app in no time!)
and more!
Be sure to download our free mobile app and check it out for yourself!


